King Size Bedroom Dressers
I have spent the past week exerting all my energy and extra time into two dressers. Usually, a dresser can take a day to complete. But, these two dressers measure over 6 feet in either length or height and were in need of a lot of tlc. Everything that I've ever learned about furniture redos, I've put into these two pieces.
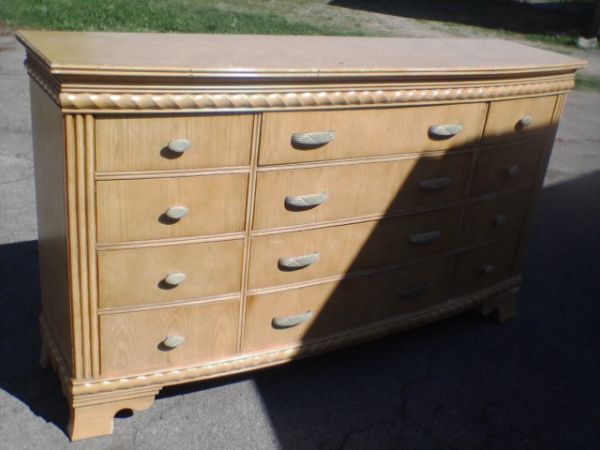
I completely forgot to post before pictures, so I grabbed these off of Craigslist before the previous owner deleted them off of the site.
Here is the long dresser that stands about 4.5 feet tall and over 6 feet in length:
The mirror sits on top and puts the completed piece over 6 feet tall.
Here is the tall dresser that stands over 6 feet tall:
After a grueling week of cleaning, filling in gaps with wood filler, gluing broken drawers together, sanding, painting several coats, hand sanding, glazing, adding a poly coat, & drilling new holes for the new hardware, I'm extremely happy to post the after pictures.
Let's see the before pictures one more time:
And again, here's the tall dresser before the redo:
Here's what I did:
1. I found a gallon of "oops" light grey paint at Home Depot and picked up a few paint brushes.
2. I cleaned up the dresser by wiping off all the tape residue and dirt.
3. I sanded down all the knicks in both dressers and filled in the gaps & holes with wood filler.
4. While the wood filler settled, I took off all the knobs and pulled out the drawers.
5. Realizing that some drawers needed wood glue, I had to pull out the glue and start fixing them up.
6. Once the wood filler settled, I sanded and smoothed out the areas.
7. It's ready to paint. I mixed up some plaster with light grey and gave each dresser two coats. (This took days and I made such a mess!)
8. While each coat dried, I tried to be cheap and just reuse the knobs by painting them black.
9. They looked terrible & cheap! So, I had to run to Home Depot and pick up new knobs. They (nor Hobby Lobby) carried any drawer pulls that would fit the smaller holes, so I had to find a pull that would cover up the existing holes. This is where I learned how to use my husband's drill & drill bits, but was done after the glaze was added.
10. I came home and gave each dresser a light, hand sanding to bring out some of it's character.
11. I added a Metallic Glaze called Black Coffee to both pieces. This was more work than I liked to share, but was worth it.
12. After the glaze was on, each dresser received a clear, poly coat.
13. All 30 drawer pulls were screwed in and drawers were put back in.
It's time to take a small break and pack up for our trip to Exponential in Orlando, FL as well as pack our home for the big move in just a few, short weeks.


How much did you get it for (if you don't mind me asking)? Did it come with a bed and night stands and armoire? You did a great job! My daughter is so impressed how you made a totally make over. Congratulations!
ReplyDeleteThanks and that i have a super offer: Who To Contact For House Renovation remodel old house
ReplyDelete